Header menu

_________________________________________________________________________________

Wednesday 30 October 2013

Add shortcode to template file in woocommerce or wordpress

Shortcode API, a simple set of functions for creating macro codes for use in post content. It enables plugin developers to create special kinds of content (e.g. forms, content generators) that users can attach to certain pages. For instance, the following shortcode (in the post/page content) would add a photo gallery into the page:     [gallery]

But this syntax work for only wp-admin post editor. If you want to add shortcode to your template file then you can use

<?php
        echo do_shortcode( '[shortcode_name]' );
 ?>
It will do same work as done by shortcode when it is added to post...

Tuesday 29 October 2013

Concatenate html tags to string in php

To add html tags to string in php ... You have to concatenate html tags with string using htmlentities()
as shown below
$newstring="<u>".htmlentities("test")."</u>";
Here i have added <u> tag to my string test which is passed to htmlentities() function for concatenation.

For more details see the example
Example:

<?php
$mystring="Hello ... This is my test string . I am testing it for htmlentities()";
echo "This is string before adding html tags"."</br>";
echo "</br>";
echo $mystring;
echo "</br>";
echo "</br>";
$newstring="<u>".htmlentities("test")."</u>";
$finalstring=str_replace("test",$newstring,$mystring);
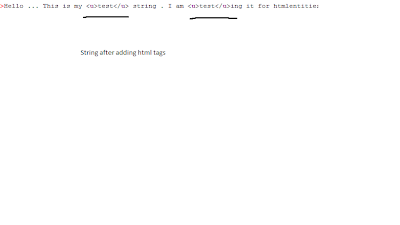
echo "This is string after add html tags"."</br>";
echo "</br>";
echo $finalstring;
?>


htmlentities

Friday 25 October 2013

Warning: Cannot modify header information - headers already sent in - wordpress after activating custom plugin

Warning: Cannot modify header information - headers already sent by

If you got error like this after activation a new custom plugin in wordpress then you can use

error_reporting(0);    // Turn off all error reporting
  
Include this statement in every file due to which you are getiing warning . You are done , no more errors now :)

But remember if you are a developer..... you are only hiding errors ... not solving them ...
Try to solve them first ... If unable only then use this :)


Warning: Cannot modify header information - headers already sent in - wordpress after activating custom plugin

Tuesday 22 October 2013

PHP cURL simple tutorial

CURL is a reflective object-oriented programming language for interactive web applications whose goal is to provide a smoother transition between formatting and programming. It makes it possible to embed complex objects in simple documents without needing to switch between programming languages or development platforms.

The strong point of cURL is the number of data transfer protocols it supports. It supports FTP, FTPS, HTTP, HTTPS, TFTP, SCP, SFTP, Telnet, DICT, FILE and LDAP.

PHP cURL allows you to read websites, upload files, upload data, fetch data and lots of more stuff ... Now its the time to see what we can do we PHP cURL...

PHP cURL example-1 :

<?php
$ch = curl_init ("http://www.alexa.com");             /** Initialise curl with url of alexa.com **/


curl_setopt ($ch, CURLOPT_RETURNTRANSFER, true);    /** Tell php curl that we want the data returned to us **/


$data = curl_exec ($ch);                            /** Execution of curl and result will be stored in $data **/

echo "<pre>";
print_r($data); /**preview result**/
?>


To understand more about cURL defination visit : PHP cURL

Monday 21 October 2013

Runtime Analysis and Time Complexity

One of the most important aspects of an algorithm is how fast it is. It is often easy to come up with an algorithm to solve a problem, but if the algorithm is too slow, its a draw back. Since the exact speed of an algorithm depends on where it run, as well as the exact details of its implementation.
Computer scientists  talk about the runtime relative to the size of the input. For example, if the input consists of N integers, an algorithm might have a runtime proportional to N2, represented as O(N2). This means that if you were to run an implementation of the algorithm on your computer with an input of size N, it would take C*N2 seconds, where C is some constant that doesn't change with the size of the input.

However, the execution time of many complex algorithms can vary due to factors other than the size of the input. For example, a sorting algorithm may run much faster when given a set of integers that are already sorted than it would when given the same set of integers in a random order. As a result, you often hear about  the worst-case runtime, or the average-case runtime. The worst-case runtime is how long it would take for the algorithm to run if it were given the most insidious of all possible inputs. The average-case runtime is the average of how long it would take the algorithm to run if it were given all possible inputs. Of the two, the worst-case is often easier to reason about, and therefore is more frequently used as a benchmark for a given algorithm. The process of determining the worst-case and average-case runtimes for a given algorithm can be tricky, since it is usually impossible to run an algorithm on all possible inputs.

                          Approximate completion time for algorithms, N = 100...

Runtime-Analysis-and-Time-Complexity
For more details visit:  Run time analysis and time complexity
Saturday 19 October 2013

Assign a php array to a jquery variable

To assign php array to jquery variable use

var jArray= <?php echo json_encode($phpArray ); ?>;

jArray  is the jquery variable which hold array in jquery and
$phpArray contains my php array ...
----------------------------------------------------------------------------------------------
For more details run below example:

<html>
<head>

</head>
<body>

<b> Hello .. Today we are assigning a php array to jquery variable <b>
<?php $phpArray = array(
          0 => "Mon",
          1 => "Tue",
          2 => "Wed",
          3 => "Thu",
          4 => "Fri",
          5 => "Sat",
          6 => "Sun",

    )?>
</body>
<script src="http://ajax.googleapis.com/ajax/libs/jquery/1.10.2/jquery.min.js"></script>
<script type="text/javascript" >
$(document).ready(function(){
     var jArray= <?php echo json_encode($phpArray ); ?>;
     for(var i=0;i<6;i++){
     alert(jArray[i]);
    }
    alert("Refresh again to see Array-Data    ")
});
</script>
</html>


Add custom price to product in woocommerce

Woocommerce saves its product price in a dynamic database table in serialized form which are present on cart..... Hence we cannot edit it directly ...

So , to add your custom price use below code:

function add_custom_price( $cart_object) {

  $custom_price = 1151; // This will be your custome price 

  foreach ( $cart_object->cart_contents as $key => $value ) {
            $value['data']->price = $my_sess['price'];
        }
    } 
 add_action( 'woocommerce_before_calculate_totals', 'add_custom_price' )
;

 If you dont know where to add this code ... Add it at the top of wocommerce-functions.php file present in wocommerce plugin
 Yippe .. Now you got your custom price for the products :)

Thursday 17 October 2013

Get textarea value in jquery from form

Normally we use val() function with element id to get value of input field of form in jquery ...

But for the case of textarea it doesnt work :(

So to get value of textarea we have to first tell to jquery that we want to access value of textarea.
To do this ..use below code:

var value= $("textarea[id$='textarea-id']").val();

For more detail run below example ::

<html>
<head>
<script src="http://ajax.googleapis.com/ajax/libs/jquery/1.10.2/jquery.min.js"></script>
<script type="text/javascript" >
$(document).ready(function(){
    $( "#b1" ).on("click",function(){
           
            var val=$("textarea[id$='textarea1']").val();
            alert(val);
        });
    $( "#b2" ).on("click",function(){
           
            var val=$("textarea[id$='textarea2']").val();
            alert(val);
        });   
});
</script>
</head>
<body>
Textarea1<textarea id="textarea1"   name="textarea1"></textarea>
<button type="button" id="b1" class="button">Button-1</button></br>
Textarea2<textarea id="textarea2"   name="textarea2"></textarea>

<button type="button" id="b2" class="button">Button-3</button>
</br></br></br>


</body>

</html>

Tuesday 15 October 2013

How cart details(product_id,prices,quantity etc) are stored by woocommerce ?

Various information about cart are stored by woocmmerce by two ways:
1. In $woocommerce object( About session , cart info, subtotal etc)
2. In database table named persistent_cart which is dynamic ... it will get destroyed as soon as checkout is done.

So , now how to access all this info ...
For the 1st kind just declare global $woocommerce object and use below code to see all details

global $woocommerce;
echo "<pre>";
print_r($woocommerce);
exit;

For the 2nd kind you have to  fetch data from table.. therefore first declare $wpdb wordpress object and write sql query to get result
one thing to note here is... data is stored in serialize manner in woocommerce_persistent_cart table so you have to unserialize it before using it
only then you can use it. Below is code to get cart information from table

global $wpdb;
$array = $wpdb->get_results("select meta_value from ".$wpdb->prefix."usermeta where meta_key='_woocommerce_persistent_cart'");
//print_r($array);
$data =$array[0]->meta_value;
$de=unserialize($data);

Redirect to a url after login in wordpress/woocommerce


By default you are redirected to my account page in  wordpress/woocommerce after login.
If you want to redirect to some other url use the code below:

add_filter('woocommerce_login_redirect', 'ras_login_redirect');

function ras_login_redirect( $redirect_to ) {
     $redirect_to = "www.google.com";    

     return $redirect_to;
}


If you provide some value to $redirect_to you will be redirected to that url otherwise
you will be redirected to my account as due to default settings in wordpress.

Sunday 13 October 2013

Update value of $wp_session['session_name'] in woocommerce/wordpress

$wp_session = WP_Session::get_instance();
 is method to create your own  session in woocommerce/wordpress.
You can use $wp_session['session_name'] on any file in woocommerce/wordpress
after creating but if you want to change its value you need to first convert this object to array.

For creating array use
$temp = current((array)$wp_session['session_name']);

$temp return you the array / value assigned to $wp_session['session_name']...
Now use or edit $temp as your need and after use assign this array again to $wp_session['session_name']
using

unset ($wp_session['session_name']);
$wp_session['session_name']=$temp;

Example :
$wp_session = WP_Session::get_instance();
$temp = current((array)$wp_session['session_name']);

/***

Work with the array

***/
unset ($wp_session['session_name']);
$wp_session['session_name']=$temp;

Convert $wp_session object to array

$wp_session = WP_Session::get_instance();
 is method to create your own  session in woocommerce/wordpress.
You can use $wp_session['session_name'] on any file in woocommerce/wordpress
after creating but if you want to change its value you need to first convert this object to array.

For creating array use
$temp = current((array)$wp_session['session_name']);

$temp return you the array / value assigned to $wp_session['session_name']...
Now use or edit $temp as your need and after use assign this array again to $wp_session['session_name']
using

unset ($wp_session['session_name']);
$wp_session['session_name']=$temp;

Example :
$wp_session = WP_Session::get_instance();
$temp = current((array)$wp_session['session_name']);

/***

Work with the array

***/
unset ($wp_session['session_name']);
$wp_session['session_name']=$temp;

Use $_SESSION in WordPress/Woocommerce

By default you cannot create your $_SESSION in WordPress/Woocommerce.
The information in $_SESSION remain in only those files on which it is created.
You cant access $_SESSION on  other file.

So, for creating your own session variable you need to install
WP Session Manager plugin.To download you can visit

http://wordpress.org/plugins/wp-session-manager/

And to use the $_SESSION you need to first create session object.
To create object use below line.

$wp_session = WP_Session::get_instance();

and to set value use

$wp_session['session_name']=array('one'=>'1','two'=>'2');
or
$wp_session['session_name']="Your value";


Note: You have to first create session object on every file where you wish to use $wp_session object.

Tuesday 8 October 2013

Add span tag( or any html tag) to link in cakephp

To add <span> tag to cakephp link add span to label

"<span>Label name</span>"

and add

"array('escape' => false)"

to link as shown in below example.

Example:
<?php echo $this->Html->link(
    '<span>My Label</span>',
    array('action' => 'add'),
    array('escape' => false)
// This line will parse rather then output HTML
); ?>
One thing to note here 'escape' => false' must be added to 3rd parameter of link.
You can see the structure of cakephp link for more information at

http://book.cakephp.org/2.0/en/core-libraries/helpers/html.html

Monday 7 October 2013

Upload and save image with thumbnail in php

upload - This is the directory where i will save my image
upload/thumbs - This is the directory where i will save my thumbnails


<?php
if($_POST){
$allowedExts = array("gif", "jpeg", "jpg", "png");
$temp = explode(".", $_FILES["file"]["name"]);
$extension = end($temp);
if ((($_FILES["file"]["type"] == "image/gif")
|| ($_FILES["file"]["type"] == "image/jpeg")
|| ($_FILES["file"]["type"] == "image/jpg")
|| ($_FILES["file"]["type"] == "image/pjpeg")
|| ($_FILES["file"]["type"] == "image/x-png")
|| ($_FILES["file"]["type"] == "image/png"))
&& ($_FILES["file"]["size"] < 200000000)
&& in_array($extension, $allowedExts))
  {
  if ($_FILES["file"]["error"] > 0 && $_FILES["file"]["name"]!=' ')
    {
    echo "Return Code: " . $_FILES["file"]["error"] . "<br>";
    }
  else
    {
    echo "Upload: " . $_FILES["file"]["name"] . "<br>";
    echo "Type: " . $_FILES["file"]["type"] . "<br>";
    echo "Size: " . ($_FILES["file"]["size"] / 1024) . " kB<br>";
    echo "Temp file: " . $_FILES["file"]["tmp_name"] . "<br>";
    $dir="upload";
    if (!is_dir($dir)) {
            mkdir($dir);        
        }
   if (file_exists("upload/" . $_FILES["file"]["name"]))
      {
      echo $_FILES["file"]["name"] . " already exists. ";
      }
    else
      {
      move_uploaded_file($_FILES["file"]["tmp_name"],
      "upload/" . $_FILES["file"]["name"]);
      echo "Stored in: " . "upload/" . $_FILES["file"]["name"];
      echo"</br>";
      thumbs("upload");
      }
    }
  }
else
  {
  echo "Invalid file";
  }
 }
?>
<html>
<body>

Create thumbnails for complete directory in php

Create thumbnails for complete directory

If you wish to create thumbnails of large number of images then use the below php code
to create thumbnails .To create thumbnails, just give the path to images directory to
$orig_directory variable and run the script and your work is done ..!!


<?php

    $orig_directory = "img";     //Full path to image folder /* change this path */
    $thumb_directory =  $orig_directory;    //Thumbnail folder
/* Opening the thumbnail directory and looping through all the thumbs: */
    $dir_handle = @opendir($orig_directory); //Open Full image dirrectory
    if ($dir_handle > 1){ //Check to make sure the folder opened
   
    $allowed_types=array('jpg','jpeg','gif','png');
    $file_parts=array();
    $ext='';
    $title='';
    $i=0;

FUNCTION.PHP file versus PLUGIN in wordpress

FUNCTION.PHP file versus PLUGIN in wordpress

If you have ever played  with a theme, you will know it has a functions.php file, which enables you to build plugin-like functionality into your theme.If we have this functions.php file,what is  the point of a use of plugin ?
 
Where should we use plugin and where should we use function.php file ?

Basically it all depends on your need.
Both do the same work , but the main difference is that a plugin’s functionality persists regardless of what theme you have enabled, whereas any changes you have made in functions.php will stop working once you switch themes.
Also, grouping related functionality into a plugin is often more convenient than leaving a mass of code in functions.php.
So it will be a good idea to use plugin if you want to use same code with different themes and different projects.

Thursday 3 October 2013

Media upload error in wordpress after installation of customized plugin

Media upload error in wordpress after installation of customized plugin
 
After installation of custom plugin in wordpress sometimes error occurs while media upload.

The reason is you have may be you have included '$' in js of plugin(replace $ with jQuery)  or might be you have added js in plugin_name.php file. 


Media upload error in wordpress after installation of customized plugin


To correct the error include your js of plugin in separate js file and put this file in plugin_name folder with plugin_name.php file.

And to use this js in plugin add the below function in plugin file.

function my_scripts_method() {
    wp_enqueue_script(
        'plugin_name',
        plugins_url() . '/plugin_name/plugin_name.js',
        array( 'jquery' )
    );
}

add_action( 'wp_enqueue_scripts', 'my_scripts_method' );


Hope this will solve your problem :)